티스토리 뷰
브라우저에서 사용자로부터 값을 입력받아 처리하기 전, 값의 유효성 검증이 필요합니다. Command Line Interface에서 사용자로부터 입력받은 값들은 대부분 if-else로 검증했을 것입니다. Springboot Web에서 사용자가 Form에 입력한 값을 어노테이션을 이용하여 손쉽게 검증할 수 있습니다. 이번 포스팅에서는 Springboot에서 Form Input값을 검증하는 방법에 대해 알아보도록 하겠습니다.
Springboot Form 예제 프로젝트 다운로드
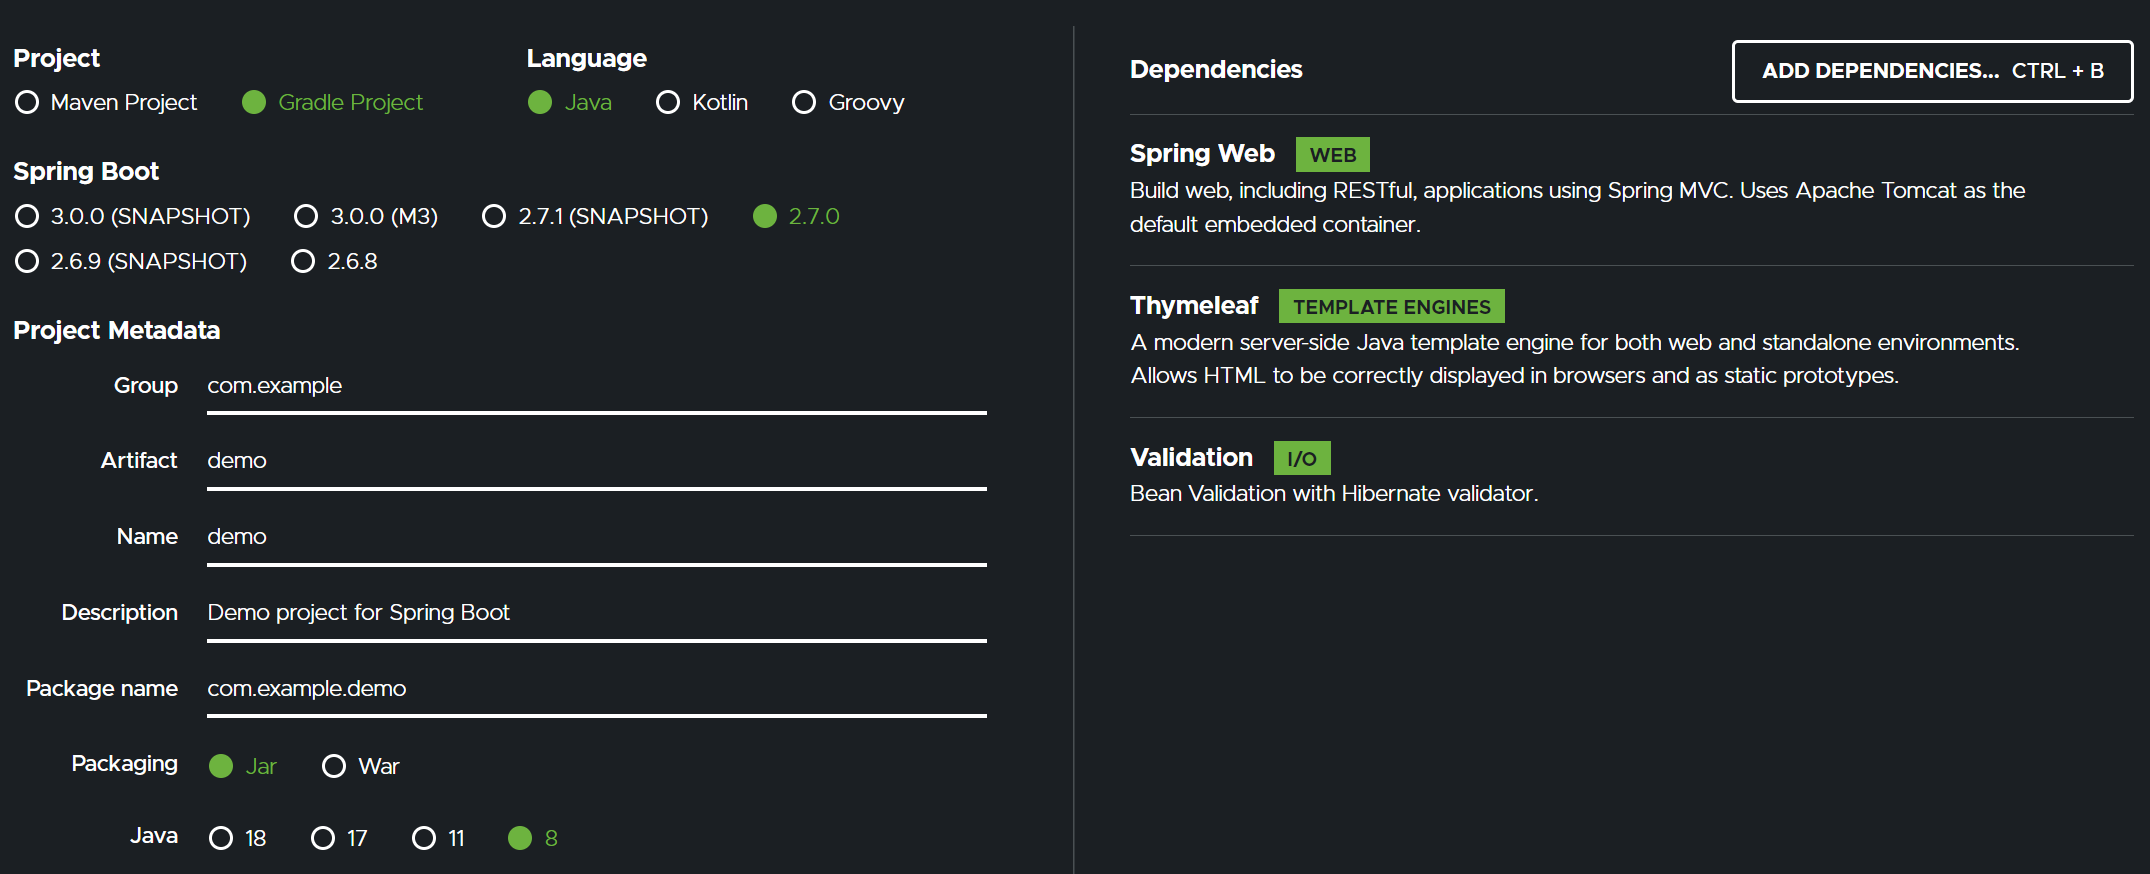
https://start.spring.io/ 사이트에서 실습하는 환경에 맞는 Java 버전 그리고 빌드 환경을 선택한 뒤 디펜던시 항목에서 Spring Web, Thymeleaf, Validation를 추가하여 프로젝트를 다운로드합니다.

프로젝트 압축해제 후, Build.gradle 파일을 열어보면 아래와 같이 3개의 디펜던시가 추가된 것을 확인할 수 있습니다.
implementation 'org.springframework.boot:spring-boot-starter-thymeleaf'
implementation 'org.springframework.boot:spring-boot-starter-validation'
implementation 'org.springframework.boot:spring-boot-starter-web'
Form 검증용 클래스 생성하기
Springboot에서는 Form에서 입력받은 값을 클래스와 어노테이션을 통해 입력값을 검증할 수 있습니다. 실습을 위해 사용자 정보를 저장하는 PersonForm 클래스를 아래와 같이 작성해보겠습니다.
package com.example.demo;

import javax.validation.constraints.Min;
import javax.validation.constraints.NotNull;
import javax.validation.constraints.Size;

public class PersonForm {

    @NotNull
    @Size(min = 2, max = 30)
    private String name;

    @NotNull
    @Min(18)
    private Integer age;

    public String getName() {
        return this.name;
    }

    public void setName(String name) {
        this.name = name;
    }

    public Integer getAge() {
        return age;
    }

    public void setAge(Integer age) {
        this.age = age;
    }

    public String toString() {
        return "Person(Name: " + this.name + ", Age: " + this.age + ")";
    }
}
@NotNull, @Size, @Min 어노테이션을 통해, 속성 값의 제약사항을 추가하였습니다. name 변수는 null이 될 수 없고, 최소 2에서 최대 30의 길이를 가지도록 제약을 추가하였습니다. age는 null이 될 수 없고, 값이 18 이하는 허용하지 않겠다는 제약이 추가되어 있습니다. 다음으로 Form 입력 처리를 위한 Controller를 작성해보겠습니다.
Form Controller 클래스 작성하기
브라우저에서 Form 화면 접근을 제어하는 Controller 클래스를 아래와 같이 생성해보겠습니다.
package com.example.demo;

import javax.validation.Valid;

import org.springframework.stereotype.Controller;
import org.springframework.validation.BindingResult;
import org.springframework.web.bind.annotation.GetMapping;
import org.springframework.web.bind.annotation.PostMapping;
import org.springframework.web.servlet.config.annotation.ViewControllerRegistry;
import org.springframework.web.servlet.config.annotation.WebMvcConfigurer;


@Controller
public class WebController implements WebMvcConfigurer {

    @Override
    public void addViewControllers(ViewControllerRegistry registry) {
        registry.addViewController("/results").setViewName("results");
    }

    @GetMapping("/")
    public String showForm(PersonForm personForm) {
        return "form";
    }

    @PostMapping("/")
    public String checkPersonInfo(@Valid PersonForm personForm, BindingResult bindingResult) {

        if (bindingResult.hasErrors()) {
            return "form";
        }

        return "redirect:/results";
    }
}
WebController는 "/" Get요청을 showForm()로 처리하고, "/" Post요청을 checkPersonInfo()로 처리합니다. showForm()의 메서드 시그니쳐를 보면 PersonForm 객체가 Argument로 정의되어 있습니다. 이는 form 템플릿과 PersonForm클래스를 연결하기 위해 파라미터로 정의된 것입니다.
checkPersonInfo()는 @Valid PersonForm과 BindingResult Argument가 정의되어 있는데, @Valid PersonForm은 Form에서 입력받은 값이 채워진 객체이고, BindingResult는 Form과 PersonForm 객체 간 바인딩을 하였을 때, 발생한 오류를 추출하기 위한 클래스입니다. Springboot는 메서드 이름을 매핑하는 방법인, 메서드 시그니쳐로 다양한 모듈과 매핑됩니다.
WebController는 WebMvcConfigure를 상속받아 addViewControllers()를 구현하였는데, 이는 results에 대한 컨트롤러 클래스를 별도로 생성하지 않고, URL과 View를 직접 매핑하기 위해 작성된 메서드입니다. 다음으로, 브라우저에서 보일 View를 작성해보겠습니다.
Form Input View 작성하기
form 소스를 src/main/resources/templates/form.html 경로에 작성합니다. 타임리프 템플릿 엔진을 문법을 활용하여, View가 작성되어 있습니다. form.html에서 form은 th:object로 personForm객체를 spring으로 넘겨받고, 선택 변수 지정자 문법으로 작성된 *{name}, *{age}로 PersonForm의 속성에 접근하고 있습니다. Form의 동작은 입력값이 앞서 PersonForm 클래스에서 작성한 제약조건에 맞지 않다면 오류가 출력되고, form 입력값이 정상이라면 results.html로 리다이렉션 되어 view가 전환됩니다. 마지막으로, Springboot를 실행하여 Form 입력값이 정상적으로 검증이 되는지 확인해보겠습니다.
<!DOCTYPE HTML>
<html xmlns:th="http://www.thymeleaf.org">
    <body>
        <form action="#" th:action="@{/}" th:object="${personForm}" method="post">
            <table>
                <tr>
                    <td>Name:</td>
                    <td><input type="text" th:field="*{name}" /></td>
                    <td th:if="${#fields.hasErrors('name')}" th:errors="*{name}">Name Error</td>
                </tr>
                <tr>
                    <td>Age:</td>
                    <td><input type="text" th:field="*{age}" /></td>
                    <td th:if="${#fields.hasErrors('age')}" th:errors="*{age}">Age Error</td>
                </tr>
                <tr>
                    <td><button type="submit">Submit</button></td>
                </tr>
            </table>
        </form>
    </body>
</html>
Form Input 검증 확인하기
springboot의 main함수를 실행한 뒤, localhost:8080에 접속하여 form입력 화면을 테스트해봅니다. 앞서 PersonForm 클래스에 지정한 제약조건에 맞지 않는 값을 입력한다면, input 화면 옆에 오류 텍스트가 출력됩니다.

만약, 입력값에 문제가 없다면, http://localhost:8080/results로 URL이 리다이렉션 되어, Congratulations! You are old enough to sign up for this site. 문자열이 출력될 것입니다. 이상으로, springboot에서 Form input값을 검증하는 방법에 대해 알아보았습니다.
'IT 기술' 카테고리의 다른 글
| 티스토리 블로그를 구글 검색에 등록하는 방법 (0) | 2022.08.16 |
|---|---|
| Springboot에서 ActiveMQ로 메세시 송수신하기 (0) | 2022.08.09 |
| Docker 이해하기(용어,장점,정의,아키텍처 설명) (0) | 2022.08.07 |
| Springboot에서 Docker RabbitMQ로 메세지 송수신하기 (0) | 2022.08.06 |
| Springboot에서 Docker Redis와 연동하기 (0) | 2022.08.05 |
- Total
- Today
- Yesterday
- MPA
- 미등기 신축아파트 전세
- 코드스멜 유형
- 전세가협상
- selenium
- codesmell 유형
- 스프링부트빌드
- TCP/UDP
- API Gateway 캐싱
- springboot rest api 서버
- 전세가격 협상
- 전세가 협의
- notion
- oracle 메모리
- springboot restapi
- iframe 태그 찾기
- 멀티코어 멀티프로세서
- 스프링부트 restapi
- 디자인패턴 구조패턴
- 미등기 신축아파트 대출
- springboot build
- 테스팅 자동화
- 신혼부부 전세
- notion 업무일정관리
- springboot 실행
- 미등기 신축 아파트
- 스프링부트실행
- 클린코드작성법
- 클린코드작성원칙
- oracle pga sga
| 일 | 월 | 화 | 수 | 목 | 금 | 토 |
|---|---|---|---|---|---|---|
| 1 | 2 | 3 | 4 | 5 | 6 | 7 |
| 8 | 9 | 10 | 11 | 12 | 13 | 14 |
| 15 | 16 | 17 | 18 | 19 | 20 | 21 |
| 22 | 23 | 24 | 25 | 26 | 27 | 28 |
